
Home Platforms News Ink Is Cheap, Mistakes Aren’...
CIO Bulletin
,
05 November, 2026
Author:
Guest
Printing a design may seem simple, but getting a professional result requires more than choosing colors and sending a file to the printer. A small spelling mistake, incorrect image size, missing font, or wrong color setting can create expensive problems once production begins. Fixing these issues on a computer takes a few minutes, while correcting them after printing can waste paper, ink, time, and money.
Pre-press preparation helps prevent these problems before a design reaches the printing stage. It involves checking every part of a document, from text and images to page dimensions and color settings. Whether you are printing business cards, brochures, flyers, packaging, or promotional materials, a proper checklist can make the entire process smoother.
Before preparing a document for printing, review the complete design from beginning to end. Do not assume everything is correct simply because the layout looks good on your computer screen.
Check spelling, grammar, punctuation, phone numbers, website addresses, product names, and contact details. Pay attention to small text that can easily go unnoticed during the design process. A single incorrect digit in a phone number can make printed marketing materials less useful. Open the document at different zoom levels to inspect its overall appearance and smaller details. Make sure headings, paragraphs, logos, and images are properly aligned. Remove unwanted elements, outdated information, and hidden objects that could appear in the final print.
A checklist makes it easier to catch common printing mistakes before submitting your artwork. Businesses working with professional printing services, Oak and Twine, can also use these checks to prepare their files for a smoother production process.
Use these points before approving any design:
Check spelling: Review all headings, descriptions, names, and contact information.
Confirm dimensions: Make sure the document matches the printer's required width and height.
Inspect image quality: Use high-resolution images suitable for the final printing size.
Review color settings: Confirm whether the project requires CMYK or another specified color format.
Check fonts: Embed fonts or convert them to outlines when required.
Add bleed: Extend background colors and images beyond the trimming edge.
Inspect margins: Keep important text and logos away from cutting lines.
Remove unwanted marks: Delete unnecessary guides, notes, and hidden design elements.
Check page order: Confirm that every page appears in the correct sequence.
Export correctly: Save the final document in the file format requested by the printer.
Completing these checks before submission can reduce delays and help avoid unnecessary reprints.
Image quality has a direct effect on the appearance of printed materials. A photograph that looks sharp on a mobile phone or computer screen can appear blurry when enlarged for a poster, brochure, or banner.
For most standard commercial printing projects, images should have a resolution of 300 DPI at their final printed size. Large-format printing can use different resolution requirements depending on viewing distance and printer specifications.
Avoid enlarging small images beyond their original quality. This can create visible pixels, rough edges, and unclear details. Use original photographs or high-quality graphics whenever possible. Also, check image placement carefully. Make sure pictures are not stretched, cropped incorrectly, or covering important text. If your design contains a logo, use a high-quality vector file when available. Vector graphics maintain sharp edges at different sizes, making them suitable for professional printing.
Colors displayed on a screen do not always match printed results. Most screens use RGB colors, while traditional commercial printing commonly uses CMYK. Converting artwork to the required color mode helps prepare it for the printing process.
Ask the printer about any specific color requirements, including spot colors, brand color values, and black settings. Rich black and standard black can produce different results, so use the printer's recommended values. Fonts also deserve attention. Missing fonts can change spacing, replace letters, or affect the overall layout. Embedding fonts in a PDF or converting text to outlines can prevent some font-related problems.
Keep the following layout details in mind:
Use consistent font sizes and styles.
Maintain clear spacing between design elements.
Check text alignment across all pages.
Avoid placing important information near trimming edges.
Make sure small text remains readable after printing.
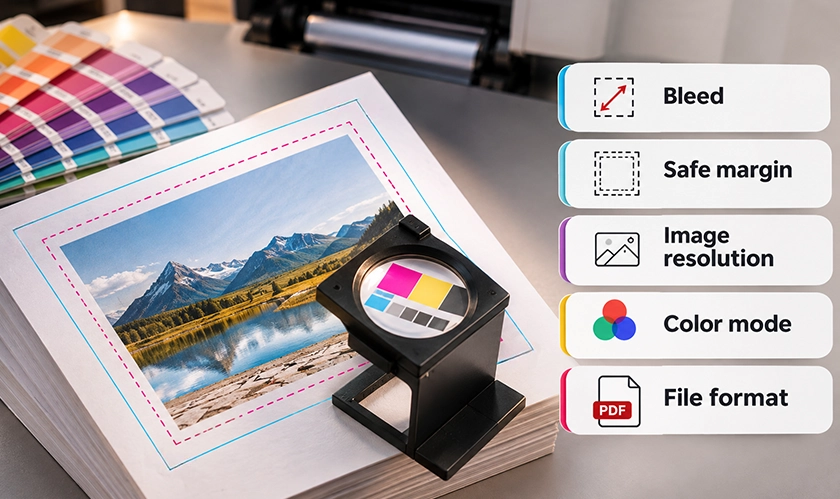
Bleed and margins are important parts of print preparation. They help prevent unwanted white edges and protect important design elements from being cut during finishing.
Bleed is the extra artwork extending beyond the final page size. Many printers request around 3 mm of bleed, although the exact amount depends on the project. Safe margins keep important content away from the cutting area.
|
Printing element |
Purpose |
Common guideline |
|
Bleed |
Prevents white edges after trimming |
Often 3 mm |
|
Safe margin |
Protects important text and logos |
Often 3–5 mm |
|
Image resolution |
Maintains image clarity |
Usually 300 DPI |
|
Prepares colors for printing |
Commonly CMYK |
|
|
File format |
Preserves artwork for production |
Print-ready PDF |
These measurements are general guidelines rather than fixed rules. Always follow the specifications provided by your printing company.
PDF is widely used for print-ready artwork because it can preserve fonts, images, page dimensions, and layout settings. PDF/X formats are also common in professional printing workflows. Confirm which version your printer accepts before exporting the document.
A design can look perfect on the first page and contain mistakes on the next. This is why multi-page documents need a complete review before final approval.
Check page numbers, headings, image placement, margins, and text flow. Look for blank pages, duplicated content, missing photographs, and inconsistent formatting. For brochures and booklets, confirm that pages are arranged according to the printer's folding and binding requirements.
Pay attention to double-sided printing. Front and back designs should align correctly, and the orientation should match the selected printing method.
It is also useful to create a digital proof or request a physical proof when the project requires precise color matching or complex finishing. A proof gives you an opportunity to inspect the result before approving the full production run.
Once the design passes inspection, prepare the final file using the printer's instructions. Select the correct page size, color profile, bleed settings, and PDF export options.
Before sending the artwork, open the exported PDF separately. Check that images are visible, fonts display correctly, and no elements have shifted during export. Review the document at 100% zoom to catch small issues that might not be noticeable in a compressed preview.
Use clear file names that identify the project and version. For example, a name such as Business-Brochure-Print-Ready-V2.pdf is easier to recognize than Untitled-Final-New.pdf.
Send only the approved version to avoid confusion between older drafts and updated artwork. Include any necessary instructions about paper type, finishing, folding, binding, or special colors.
Good printing starts before a machine produces its first sheet. Taking time to review text, images, colors, dimensions, and export settings can prevent expensive mistakes and improve the quality of the finished product.
A consistent pre-press routine also makes communication between designers, businesses, and printing teams easier. Everyone knows what has been checked and which specifications need approval.
Remember that ink and paper are only part of printing costs. Reprints, production delays, and wasted materials can increase the overall expense of a project. A few extra minutes spent checking artwork can save hours of correction and unnecessary spending. Treat pre-press preparation as an essential part of every printing job, not an optional last step.





















































 consultants ltd.jpg)


Comments